
The RelistKit Workflow
RelistKit works best when you follow one path for every item. This article explains our recommended path and why we suggest following it. Once it becomes a habit, you'll be able to take an item from photos to published on multiple platforms in less than three minutes.
Why Poshmark first
Poshmark is where you already take photos and make drafts, and its draft form is the one RelistKit reads best. So every item starts as a Poshmark draft. RelistKit writes the listing there, you publish there, and everything else flows from that one source. You never type the same thing twice, and there is exactly one place where the truth about an item lives: its item page in RelistKit.
The path
- Photograph and draft on Poshmark. We recommend starting form the Poshmark app on your phone, where you can take or add photos to create a new draft listing. Add the photos to the new listing, but don't write anything yet. A draft with photos is all RelistKit needs.
- Visit your My Drafts page in Poshmark on your computer, where you'll see any drafts you created on your mobile device. Open one of the draft. Near the bottom of the page, you'll see the RelistKit button, which shows the extension sidebar.
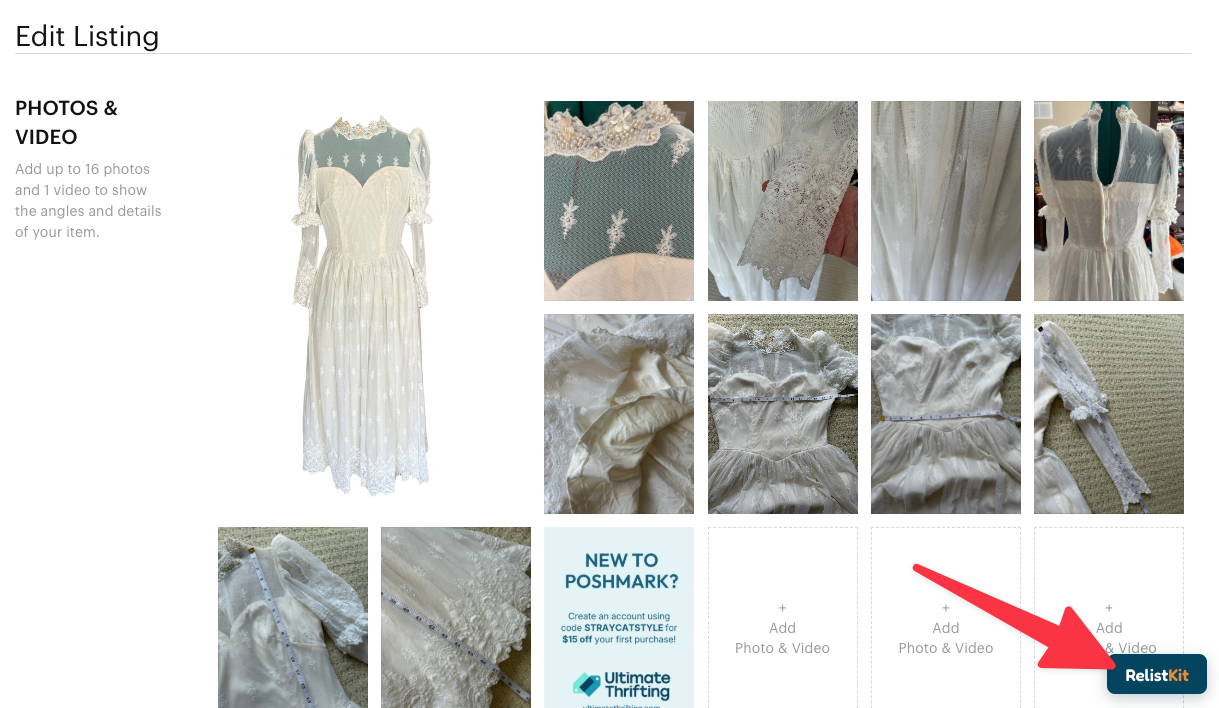
- To generate a listing from your photos, enter a SKU and cost (while optional, both are highly recommended) and click Generate listing. RelistKit reads the photos and fills the Poshmark form. It populates:
- Title
- Description
- Brand
- Category
- Size
- Colors
- Condition
- Review what was generated and make any appropriate changes. The AI generation system won't always get everything right, so the manual review is important.
- Publish the listing on Poshmark (still from your computer and the draft listing). RelistKit tracks the publishing behind the scenes and show a confirmation in the sidebar after publication.
- Click the Open in RelistKit button. While other options exist, opening it in RelistKit first gives you a chance to create square versions of photos before cross-listing to other platforms.
- For key photos that can be safely cropped (don't create square versions if it means losing important details), click the scissor icon next to the associated photo. Drag the square to an appropriate area, then click Save crop. If you decide not to create a square version, click Use the whole photo instead.
- Under Platforms on the right side of the page, click the Cross-list to all button. This will open new tabs for each of your platforms and create draft listings for the item.
- Once complete (it can take up to a minute), review each page and confirm the details and photos are correct. If they are, publish the listings.
Why a manual review is important
The fill is only as good as the item page. A title that is fine for Poshmark may be too long for eBay, and a non-square main photo gets cropped by eBay in ways you will not like. AI generation isn't infallable either, so giving everything a quick glance helps to prevent future issues.
What you already own: bring the closet in
If you have hundreds of listings on Poshmark from before RelistKit, you can import them in bulk. On your closet page, click the RelistKit button in the lower right corner and then Import this closet. RelistKit brings every available listing into your inventory as an item, photos included, at a human pace while you keep the tab open.
Common questions
Can I start on eBay instead?
No. Drafts start on Poshmark. You can still sell on eBay without Poshmark by listing there directly, but RelistKit will not write or cross-list it.
Do I have to cross-list everything?
No. Cross-list what you think will sell elsewhere. Your inventory shows which platforms each item is on.
What if I change a listing on Poshmark later?
RelistKit re-reads the Poshmark listing each time you cross-list, so the next cross-listing carries your change. Cross-listings already published do not change themselves; edit them on their platform.